
Welcome, welcome, welcome to a new realm in our QA journey! We are fully equipped with our skills in bug writing, black box design, test plan, and RTM writing as well as having Jira, spreadsheets, and TestRail in our toolbox. Now, let’s investigate different types of testing.
1001 Test Nights
Take a moment of thinking now. How many kinds of testing do you think out there that can be performed to validate the quality of an application? 5? 10? Nope. There are probably hundreds of different types (Our author can think of 30 of them at the moment)! We will try to cover as much of them as possible as Funky QA, but let’s start with the basics.
We can categorize testing types by 3 things: Scope, execution tool, and approach. As simple as that.
By Scope/Objective
By scope, we mean what part or aspect of the application we are trying to verify. This can also be sub-categorized by “functional” and “non-functional testing”.
Functional testing focuses on the behavior of the application that users will be directly interacting. Component, integration, system, smoke, user acceptance, exploratory testing, etc. fall into functional testing. We will learn about all of these methods, excited? Well, you should be!
On the other hand, most testing of the background of the system is considered non-functional testing. It can be any kind of performance, security, and the compatibility test.
By Execution Tool
Execution tools can be either humans (Yes, unfortunately, we are tools) or robots. Which interprets the manual or automated testing. Although automation is more commonly used to do non-functional testing, we cannot tie either of them into functional or non-functional testing, as both tools can be used to perform each of them.
We have already covered both of their usages in depth at literally the first testing tutorial of this house. Go and visit that room now. Yes, this is an order. Here’s the key > Manual or Not to Manual
By the inner system knowledge
Either we know and deal with the inner system of the application, or with the sides of the app that does not require an inner system knowledge to perform the testing. This distinction gives us the famous distinction between “black-box” and “white-box” testing. We have introduced them in the Black Box Design tutorial. The below table pretty much sums up what is both of them.
| Black Box ⬛ | White Box ⬜ | |
| Scope | Functional and non-functional aspects of the application | Backend logic and the source code of the application |
| Executor | QA Testers | Developers or SDETs |
| Required Skills | Testing Skills | Programming Skills |
| Common Levels | Acceptance, System | Unit, Integration |
| Required Project Knowledge | Business and functional requirements of the software | Internal structure of the system |
In Funky QA, we mostly focus on black box testing, but, good news, we will also have a tutorial on white box design techniques later. Remember the technical black box tutorial? This one will be even more brain-opening than that!
By Approach
We can lastly classify testing types by the approach. Here comes one important point, that we will be talking about for the rest of this chapter. “Static” and “dynamic” testing.
Another simple explanation… wait for it…
Static testing is verifying the requirements, design, and code of the application, and dynamic testing is validating the working application.
That’s it. We’ll dive into how to perform each of them in detail very soon, but for now, just keep this definition in mind. Hey! I saw you released it, hold it back!
Out of all the categorizations made on testing types, we find this one to be the most accurate grouping because this is what we made. Sometimes dynamic testing is used interchangeably with functional testing, but non-functional testing can also be static, or vice versa. So, it’s better to classify them by these types to avoid overgeneralization.
*TODO: Insert classification diagram
Static & Dynamic Testing
Before learning about static and dynamic testing, let’s think about what static and dynamic are. (We actually don’t need to think about it, but we need a catchy introduction here, so just pretend to be like thinking and being inspired.)
Static is the adjective to describe an object that is not changing or presenting any action. And dynamic is the opposite of it, that the object can change, move or present any other action.
Static Testing
In this sense, any software is born with a static presence before it turns into a real, working program. When the idea is in our mind, then when we set the business and functional requirements, document the design specifications, and perhaps write the code but have yet to execute it, the software is in its static state.
And yes, static testing is verifying the quality of all these things we counted. We perform this testing usually in two parts.
Reviews
Reviews are done on the documents of the project to mostly find the defects and discrepancies in the requirement and design documents.
It starts with the “walkthrough” of the documents by the owners of them to explain everything in detail. These documents mostly include the use cases, functional requirements, and the design specifications.
During the walkthrough, everybody in the QA team can provide their input, and they also do an “informal review” and provide feedback on the risky features or the conflicts in the application. Tester fellows, this is your first and last chance to insult the app if there is something you don’t like. If you have slept during the static testing, then you don’t really have a right to curse the developers during dynamic testing.
After the informal reviews, “technical inspections” are done by the experts on the system specifications and the architecture of the software to find any early defects in the application.
Static Analysis
Here comes the cooler name, static analysis simply means reviewing the code itself without executing it. It is not the same as “white box testing” where we test the inner mechanism of the application, but it is a part of it as white box testing also extends to dynamic testing where we test the output of the code. Remember that in static testing, there is no working application, so we need to test the code without running it. But how do we do that?
Most of the time, the static analysis process is automated by the built-in tools of the IDEs (Integrated Development Environment, where the developers write the code. Android Studio is an example of IDEs), or by external tools like CheckStyle for Java code analysis. For popular languages like Java and Python, there are plenty of tools to automate it, but especially in the organization where custom scripting languages are used, this task is done manually by technical testers or mostly by the developers. So, what do we verify in the code analysis?
Anything that reduces the quality of the overall code, and perhaps causes errors should be caught during this analysis. These things include syntax errors, dead code, incorrect variable usage, and so on. We won’t get into the details of these esoteric terms, till we get to our white box testing tutorial (Funky King knows when).
Dynamic Testing

Returning back to the definition, for dynamic testing we need the code to be already executed and the program to be working. The objective is to validate if the application is implemented and working according to the requirements and specifications. Ideally, static testing must be done before doing dynamic testing to make sure the requirements are legit, and the by-design bugs are prevented.
Technically, all the testing we perform (both functional and non-functional) on the working software can be considered dynamic testing. Here, we will discuss what we call the dynamic functional “testing levels”. Knowing those levels is crucial, as they apply to most projects where there is thorough testing has to be done.
Peeps who went through the SDLC Types tutorial actually have an idea of what we’re going to talk about. (Hint: V-Model)
We will go through the levels from the bottom (least complex) to up (most complex).
1. Component (Unit) Testing
(Author just came up with an excellent analogy while writing this) If we think of the application as a meal, after making sure the food’s recipe is correct, we need to make sure we have all the ingredients properly, (correct ingredients, not having exceeded the expiry date, good quality brands, etc.)
Ingredients of the meal = Units of the application. Get it?
When we are doing unit testing, we are aiming to break down the application into the smallest possible parts of it and beat them down in an alley while they are away from their friends. We have to test those components of the program first, before going up to the next levels to eliminate the basic defects.
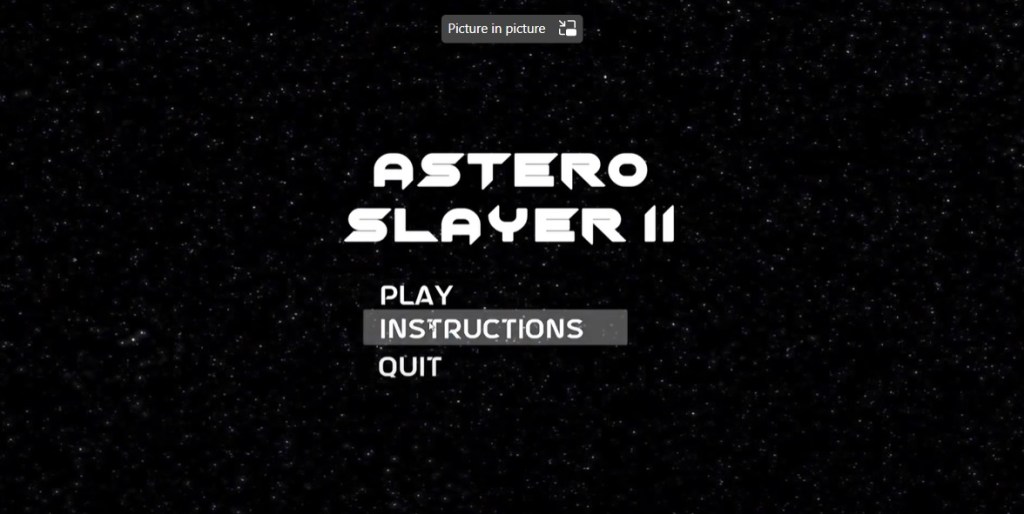
For example, in this simple example, instead of testing the main menu of the game as a whole, ideally, we should test each element (in this case, the buttons) alone before performing any other testing.
But I heard different things about unit testing?
What we have just explained is unit testing in black box testing. But actually, in the software universe, unit testing is notorious (due to its tedious aspect) in white box testing where the developers perform to test the underlying code of the application without doing any interaction with the interface. Let’s briefly learn about software unit testing as well to develop empathy for the coders’ suffering.
Programs are written as the collection of “functions (also called “methods” in some languages)”. As we have components as the smallest units of the interface, we have functioned as the smallest units of the source code chunk.
Depending on the project, developers are required to have a certain “code coverage” (percentage of the tested functions). They write the “unit tests” code separated from the program’s code, using a testing framework (like JUnit). Those unit tests are stored in “test suites” (a file as the collection of related unit tests), and before shipping the application for the actual testing for QA, they execute these test suites automatically to validate there is no mistake in the source code output.
Confused about static, black box and white box unit testing? That’s what we guessed. Let’s clean up the confusions by the table below including the practical examples.
1.5 Static, dynamic, manual, automated, black box, white box, what on earth is going on?!
In one elegant example, you will have an epiphany on these different topics, and the world will look so much brighter and more vivid before we get to the integration testing.
We will cover the differences between several combinations by testing the simple ‘quit’ button in the sample game main menu GUI above.

Static-black-box
In the first combination, we need to verify the requirement and design of the quit button component. There is no strict test case for this testing, and we will merely review the documents written for it.
- The quit button will allow the user to shut down the user immediately when its clicked.
- It must be present in the main menu and the in-game menu.
- It should have the same design as the other buttons with the font type and color, and visible back layer color on hover.
In this case, the issue we may want to raise could be on the first point regarding the user experience. It can be suggested to display a popup of “Are you sure you want to quit?” instead of immediately closing the game.
Static-white-box
Rather than the component itself, here we need to review the source code written for it, without running the program. Let’s take a look at those two pieces of code. (Before screaming BUT I DON’T KNOW CODING, calm down, we will make it very simple)
Let’s say the piece of code in the script written in the Unity framework of the C# language attached to the quit button looks like that:
public void OnClick()
    {
        Applicatiom.Quit();
    }
Here we are doing a static review to see if any mistakes in the code. Which there is, note the typo at the Application object, which would cause the button to not function properly if not fixed.
Dynamic-white-box
In dynamic white box testing, we can use code unit testing, as we actually execute the code to see the output of it, but still not interact with the actual application.
public void QuitButtonPasses()
    {
        QuitButton.OnClick();
        Assert.isFalse(Application.isPlaying);
    }
The above code is a unit test to validate the OnClick function we have written. We execute the function first and then checked if the application is still playing. Since there was a mistake in the function’s code, this test case will fail.
Dynamic-black-box (Manual)
What, do we QA testers perform most of the time. While the application is running, we validate if the button is acting as per the expectations, or if it fails its family’s expectations. So, the test case for it will look as simple as that below.
| Expected Result | Reproduction Steps |
| Game shut down | 1. Open the game. 2. Click on the ‘quit’ button at the main menu. |
Do we need more details for this combination, peeps? Sure, we can give some. How about checking the Test Cases tutorial?
Dynamic-black-box (Automated)
Now, this last type is a bit tricky because it can be easily confused with dynamic white box testing as we are writing code for both of them. But remember the fundamental difference between these types is the inner system interaction.
In white box testing, since we know the code behind the button, we could directly test the code, but here we are still interacting with the user interface and not with the backend logic. So, our unit test would just be the digital replica of the user’s behavior.
public void QuitButtonPasses()
    {
        QuitButton.Click();
        Assert.isFalse(Application.isPlaying);
    }
It looks nearly identical to the previous one, but the difference is that in the white box testing, we have accessed the button click method through an abstract object, but in the dynamic testing, we are accessing the button itself and clicking on it without directly executing the function behind it.
Hope these terms got a bit clearer with the examples. It is not strongly required to have knowledge of these distinctions as a testing plebian, but nice to have it as a QA nerd. Let’s finally jump to integration testing, before throwing up from unit testing.
2. Integration Testing
Continuing from the meal analogy, when we combine 2 or more ingredients together, that means we are “integrating” them. Such as, when we are making pasta, we can make the sauce of the pasta by using tomato paste, olive oil, and garlic powder (That’s pretty much how Funky QA cooks pasta every day). If we were to do unit testing, we would test each of those ingredients, but in integration testing, we test (or taste) the integration between them, like the taste when garlic powder is added to the combination. It is great by the way, put as much as you can. (See, there is no such thing as too much garlic)
We like Mr. Quit Button, so we requested to host him for the integration testing introduction as well, and he was kind enough to accept our invitation. So, moving from the pasta analogy, the quit button can be integrated into multiple different parts of the game, like the main menu or the in-game pause menu. Validating if it functions properly in both of the modules is an example of integration testing.
Integration testing is a bit more complicated to perform than unit testing as there are multiple types and a few new concepts to understand about it. You will see the concepts as we go through the integration testing types. Lego.
1. Big Bang Method
Let’s think about the character selection menu functionality of a combat game. In this case, we are integrating the character modules with the selection menu module, and it results in the character selection feature.

In this scenario, all the modules are integrated into the menu, and we need to test them as a chunk. It’s the easiest and the most straightforward type of integration, as there is no need for the “stubs and drivers” (Coming soon, chill down).
Using this approach makes the most sense for small applications, as it’s faster to perform than the other methods, but if the system or the integrated modules are too large, it gets harder to find the cause of the defects.
For the bigger apps with multiple development teams, “incremental approaches” suit better. That means, instead of developing and testing multiple module integrations as a chunk, hierarchically integrating them as parent and child modules. Wondering the first incremental method? Jump to the next paragraph already.
2. Bottom-Up
In the bottom-up approach, top-level (parent) modules are created on top of the low-level (child) ones, as in the “man-made gods” (Ok, there is no connection with that saying. Or is there?).
In bottom-up testing, similar to bottom-up development, testing is done from the lowest modules and progresses to the higher components.
Continuing from the character selection example, since we are doing incremental testing, we don’t have an end-product-looking module to test, but we still need to validate the integration of the features. So, class, tell me what the low and high modules are in the character menu? Correct! Characters are the child and the menu itself is the parent component.
Since we are starting from the bottom, we already have our characters. We have done the unit testing, by testing each of them, but now we need to integrate them into the character selection menu. Problem! The UI team is still working on the menu, and we cannot test the selection functionality without having the menu! Or can we? Meet with our best friends, “drivers”.
Drivers?
In this example where we don’t have the menu, what we are lacking is the trigger for, in other words, something to “drive” the functionality. So, we don’t actually need the actual menu to test the feature, and only the mock version of the menu will be enough for the testing. We call that mock menu (a small piece of application) a driver.
Drivers are usually made by the developers, but sometimes they might need to be developed by the QA team as well. The UI of the driver for our selection feature may look as simple as that:

With the help of this driver, we can select whatever champion we want and test if the same champion is displayed and playable in the game as well. Voila!
Although this example does look fairly nice as the developers have a certain respect for the testers, drivers don’t have to look good as long as they serve their purpose. They can even be used through a command line by executing some commands set by the developers, like:
champion select 00001But, what about if we only have the menu and no characters to test yet?
3. Top-Down
This time we have the parent module, and the selection menu did. We have unit-tested the menu, but we need to test the integration of it with the characters as well, but there are no characters created yet. Should we panic? Or should we think like, hmm if we have drivers as the proxy for the non-existing parent components, we should have something to act as the child components too? If you panic, you will be put into the game as a character and will be fighting with others for eternity (Willy Wonka vibes). If you are thinking logically, let’s discover the “stubs” together.
Stubs!
Again, the same question, what are we lacking that prevents us from testing? Some characters. Do we need the actual ones? No, we can simply use some mock ones to see if they are displayed in the menu and the game after they are selected.

We have captured Kipo to be the stub as he panicked at the beginning of this section. It’s not a real character to be played in the game but can be used to represent the characters’ behavior in the selection menu so that we don’t need to have the actual ones developed to perform this top-down integration testing.
Although we gave stubs to have a visual representation, in the program’s logic, they are also a piece of code, just like the drivers. In this case, the GUI form of the stub we created is Kipo, but it can also be a mere code response from the command line to our action of selecting a character.
4. Sandwich Testing
Yes, that’s literally the name of this last integration testing approach (It’s also called the Hybrid Method). We saw incrementing can be either way, towards the top or bottom. But why can’t we increment the system in both ways?
In the bottom-up testing, our main and primary layer is the low-level units, and in the top-down method, it is the parent component. In the sandwich method, our main module is the central one, and the incrementing is done both on top of that layer, as well as the sub-layers, are being created, so we need to perform both incremental testing methods. It is the most complex of them all to do, as we need both drivers and stubs to perform it.
Now is the time to go up one more level, and finally taste the whole meal!
3. System Testing

After tasting the combination of the ingredients for our pasta (sauce, meat, boiled raw pasta, spices), we can finally pre-taste it as a whole before serving it to the gourmet for final verification. Not only the taste of it but also the quality of the smell, temperature, appearance, serving, structure, and ease of eating are the things we may have to validate to see if it is up to the expectations.
System testing of software is not much different than the pasta example. After completing the integration testing, QA and the developers perform a final end-to-end validation of the application. Although we are putting system testing under the functional testing levels, it is actually a procedure of testing including both functional and non-functional types, like performance, installation, and security testing.
How to?
The key is not going too much into the details of the components and seeing the application as an entire system. For example, the data flow should be tested from the beginning till the end, security should be validated as if there is an attack on the whole system instead of a single module, or the integrity of all the elements and the responsiveness of the whole page should be checked if we are to do a UI testing.
Oh, it’s same as the end-to-end testing, right?
NO! Although they are often used interchangeably, or even worse as two completely separate things, they are not. We can think of end-to-end testing as a testing approach of going through the paths of different user behaviors on a complete system. In this sense, we can say that e2e (end-to-end) testing is a subset of system testing. Any other question?
Why do we bother?
Of course, classic. If we test all the components and their integrations, let’s just ship the application. Okay, in the pasta, all the ingredients might be quality, and all the sauce and the meat might taste great, but what if they are not put in the right amount? Then, wouldn’t all our work go to the trash? (Don’t waste food, kids, this is just an analogy.)
System testing is also integration testing, as we are simply checking the integration between all the modules, so it is necessary. Also, the things like there are some testing we will have to perform on the final system and cannot do on the component or the module level, like performance testing.
The good news is that system testing is usually automated as it may take a lot of time for impatient clients. E2E automated testing tools like Cypress and Selenium come to the rescue in this automation, but that is the topic for another saga.
Ready to go yet? We tested the complete application, is there anything left? Well, justt one more.
4. Acceptance Testing

The chef and the gourmets tasted the food, and now the customer themselves will do the final tasting to see if it is acceptable to be served. Hate to admit it, but the customer has the highest place in the software project hierarchy as well.
Different from the system testing, this final testing merely focuses on functional black-box testing. It is done in an environment very close to the final product one, and can be done by project managers, another QA department (e.g., Certification testing for specific consoles), or by the end users depending on the type of acceptance testing (Yes, sorry, there are more subtypes). Let’s see the major subtypes of it.
Business Requirement Testing
Usually done by the project manager, client, or business analyst through “happy-path testing” (According to the expected user behavior, and not to break the system) to see if the application generally meets with the requirements set by the client.
Regulatory Testing
Performed by the experts to verify the software is up to the legal standards. This is especially relevant for certain video games to ensure the game is suitable for the intended audience. For example, excluding discriminative expressions, extensive gore, or vulgar and offensive language if it’s designed for kids. Or including warnings for epilepsy people in the appropriate places in the game. So, performing this testing is important to avoid any legal conflicts in the future. (Not only legal but also to silence your conscience.)
Operational Testing
Also called, “operational readiness testing”, it focuses on validating if the application is fully ready before flying out of the nest, a.k.a. the deployment/release. Backups, system recoverability, error messages, downtimes, etc. are tested during it to make sure the software can survive alone without constant maintenance from the development team.
Alpha Testing
Performed by the alphas (QA team, of course) on the release build using both black-box and to ensure there is no defect on the final version of the application. It is done on the requirements and the main concern is whether the app fully functions. Bugs are smashed (“hotfix”) by the developers as soon as they are found. As an example, “playtesting” done by game testers is a popular type of alpha testing.
User Acceptance (Usability) Testing
Unlike the others we mentioned, this testing is not done by any professional and done by randomly chosen users. There are several methods to perform user acceptance testing, like walkthrough, monitored sections, or card sort. We will have an entire tutorial on this type of testing soon.
Beta Testing
In other words, “public testing”, this last type of user acceptance testing is performed by the biggest power in the world… the power of ordinary people.
Before the final product is released to the market, producers of the app release the “beta” version for the audience to try and let them throw tomatoes if needed. The public tries the app and finds the uncaught bugs, and give feedback on the usability, whether they like it or not, and the developers can do fixes accordingly. But more than if the software works, the main focus is if the users like the product.
This type of testing is also used frequently for games as the main objective of video games is to give players what they like.
Pasta is ready to serve the customers. We can now to wait for them to pass out from joy!
But what if during the meal tasting, chef decides to change some ingredients or anything in the food? Should we perform a particular method of testing to ensure that nothing else is affected badly? Please check the last core testing type, kind person.
(non) Regression Testing
When a change is made to the existing code (can be for modifying a feature, removing a module, fixing a defect), we of course cannot ignore the change and should retest the feature that the code change affects. This is literally called, “retesting”.
Retesting is done most often to verify the bug fixes. It is sometimes used interchangeably with regression testing, but regression is a bit more than simply testing the feature again.
By definition, regression means “returning to a former or less developed state”. From that, regression testing (or, more accurately the non-regression testing) means, re-validating the application to make sure the system did not “regress” from the change. So, do we have to retest the entire app?! No, buddy. But maybe. Let’s see.
1. Unit-level
In the unit-level regression testing, only the changed part of the application is retested. Only testing the affected unit is suitable for the relatively independent modules.
For example, as we can see in the below image, strength and weakness image assets for the character profile is missing. After this issue is fixed, we need to do regression testing to verify the fix. But the issue is pretty much tied to the particular section in the game, so the fix would not really affect any other areas. In this case, we can get away with only doing the unit-level retesting.

2. Regional-level
Sometimes the changes are not that simple, and it can affect other areas as well.
From the same example,
What a chapter! We found out how to categorize testing types in several different ways, learnt about static testing, dynamic testing and its levels in depth with a load of practical examples.
These were some of the most core testing types that are performed nearly all projects. We still have 2 more basic types to cover. Wanna find out? Let’s escort you to the regression testing tutorial, kind person.
